

Keep Your Ride Shining: The Ultimate Guide to Headlight Clarity, Restoration, and Protection
Keeping your car’s headlights in top shape is key to safe driving, especially when the sun goes down. Crystal-clear lenses mean better visibility, which directly cuts down your risk of an accident. In this comprehensive guide, we’ll dive into why headlight care is so important, what causes those lenses to get cloudy or yellow, how to bring them back to life, ways to keep them looking great, and how to make sure they’re performing up to snuff. Whether you’re planning to tackle hazy, yellowed lenses with some handy DIY products or you’re thinking about a professional polish at your local auto shop in Columbus, Ohio, this article is packed with practical tips, product recommendations, step-by-step instructions, and expert insights to keep you safe on every journey, no matter the conditions.
Why Is Keeping Your Car’s Headlights Pristine So Crucial for Road Safety?
When your headlights are well-maintained, their lenses stay crystal clear, allowing the bulb’s full brightness to shine where it needs to – on the road ahead. Clear lenses also ensure the light beam is properly aimed, reducing glare for oncoming drivers and improving your own peripheral vision. This clarity directly translates to spotting hazards sooner, giving you more time to react, and keeping you compliant with vehicle lighting laws.
How Do Cloudy and Yellowed Headlights Mess with Your Nighttime Vision?
Hazy or yellowed lenses scatter the light beam, significantly reducing how much light actually reaches the road. This diffused light creates a halo effect, making it harder to see contrasts and obscuring important road markings or potential obstacles. Restoring the lens’s clarity refocuses the light, helping you make safer decisions when cornering or braking in low-light situations.
What Are the Legal Rules for Headlight Clarity and Performance?
Vehicle lighting regulations require headlights to provide sufficient brightness and be correctly aimed to avoid endangering other drivers. In many places, guidelines specify maximum upward angles for the light beam and minimum light intensity levels at certain distances. Keeping your lenses clear and free from distortion is essential for meeting these standards and ensuring your vehicle is road-legal.
How Does Taking Care of Your Headlights Lower Accident Risks?
When your headlight lenses are clear, the light beam reaches further and is more uniform, making it easier to spot pedestrians, road signs, and debris. By preventing oxidation and cloudiness, regular maintenance reduces the chances of misjudging stopping distances or navigating curves after dark, ultimately cutting down accident risks through reliable forward visibility.
What Causes Headlight Lenses to Degrade, and How Can You Spot It?
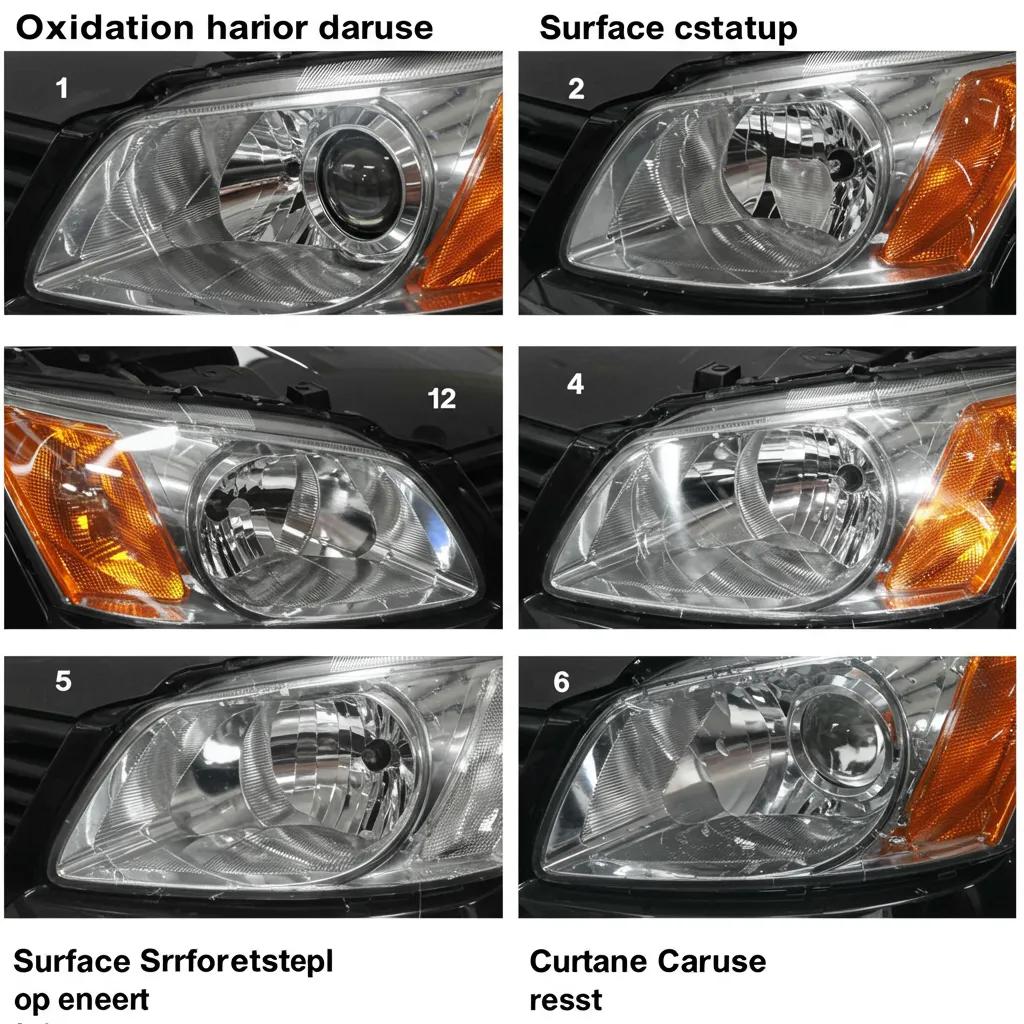
Headlight lenses, usually made from tough polycarbonate, degrade due to a mix of ultraviolet (UV) radiation, airborne grit, and everyday wear and tear. UV rays break down the outer layer of the lens, while road dust and tiny stones cause micro-scratches. Catching these issues early can prevent more serious damage and restore the lens’s ability to transmit light effectively.
| Type of Damage | What Causes It | How to Identify It |
|---|---|---|
| Oxidation Haze | Exposure to UV rays | A yellowish or brownish cloudiness |
| Surface Scratches | Impact from road debris | Visible fine lines and a rough feel |
| Chemical Etching | Acid rain or harsh cleaning agents | Dull, frosted-looking patches on the lens |
| Moisture Inside | Failure of the lens seal | Fogging or water droplets visible inside the lens |
The table above breaks down common headlight damage types and how to spot them. Recognizing these signs early means you can tackle them with targeted cleaning and restoration, bringing back safety and avoiding the expense of a full replacement.
What Are the Main Culprits Behind Foggy and Yellowed Headlights?
Fogging and yellowing are primarily caused by UV radiation breaking down the polycarbonate material, leading to surface oxidation. Other contributing factors include the heat generated by the bulbs and chemical reactions with road salt or leftover polishing compounds that weren’t properly sealed.
The way polycarbonate breaks down is a complex process, influenced by a variety of environmental factors.
Mechanisms of Polycarbonate Degradation in Automotive Applications
Bisphenol-A polycarbonate is a widely utilised thermoplastic. Patented in the mid-1950s, it has found numerous applications, spanning consumer goods to the automotive sector. It is well known for its transparency, leading to widespread use in lighting and optical applications. The degradation of polycarbonate is strongly influenced by numerous factors, including processing, temperature, and/or light exposure. The primary degradation mechanism involves a photo-Fries rearrangement followed by oxidation. The precise details of these mechanisms are not yet fully understood. This chapter presents the current state-of-the-art regarding both the known and unknown degradation mechanisms of polycarbonate.
Degradation mechanisms of aromatic polycarbonate, TL Hoeks, 2022
How Does Polycarbonate Material Respond to Environmental Damage?
Polycarbonate starts out as a strong, clear plastic, but prolonged exposure to UV light makes it brittle and discolored. The degradation process creates tiny cracks that trap dirt and moisture, speeding up the hazing and weakening the material’s structure.
What Kinds of Headlight Damage Should You Keep an Eye Out For?
Carefully inspect your lenses for any chalky residue, fine scratches, or uneven light patterns. If you notice dim spots or the light beam seems to be spreading out too much, it’s a sign of deeper oxidation or abrasion that simple cleaning won’t fix.
Chemical reactions can also lead to visible damage on the polycarbonate surface of headlamps.
Root Cause Analysis of White Patch Formation in Automotive Headlamps
A root cause analysis was performed on the white patch formation observed on the headlamp lens of a specific automobile model. The white patch region was analysed using SEM, FTIR, and XPS techniques. Headspace GCMS and TGA were employed to analyse volatiles and curing characteristics, respectively. The white patch region exhibited foreign deposits and evidence of chemical attack, manifesting as undulations and holes on the polycarbonate lens surface. The holes resulting from chemical attack on the PC lens are attributed to the degradation of the polycarbonate surface.
Root Cause Analysis and Mitigation of White Patch Formation in Automotive Headlamp, MD Pustode, 2021
How Can You Effectively Clean Your Car’s Headlights for Sharper Clarity?
Effective headlight cleaning involves a combination of gentle cleaners, mild abrasives, and protective sealants to strip away surface oxidation and grime. The basic idea is to use controlled abrasion to remove the damaged outer layer, then polish it smooth for maximum clarity. Restored lenses boost light output and help you avoid replacing them prematurely.
What Are the Top Car Headlight Cleaning Products Out There?
| Cleaning Product | What It Does Best | Main Advantage |
|---|---|---|
| DIY Restoration Kit | Comes with various grit sanding pads | Effectively removes deep oxidation |
| UV Protective Sealant Spray | Creates a barrier against UV rays | Keeps lenses clear for up to a year |
| Mild Abrasive Cleaner | Gentle, non-scratch formula | Cleans light dirt without harming the lens |
What’s the Step-by-Step Process for Basic Headlight Cleaning?
- Start by washing the lens with soap and water to get rid of loose dirt.
- Apply a non-scratch abrasive cleaner and gently rub it in with a soft cloth.
- Rinse the lens thoroughly and make sure it’s completely dry.
- Apply a UV protective sealant and let it cure according to the product’s instructions.
How Often Should You Clean Your Headlights to Keep Them Safe?
A good routine is to clean them every three months to maintain optimal light output and prevent minor oxidation from becoming a bigger problem. If you live in an area with intense sunlight or drive a lot at night, you might want to consider cleaning them every two months.
What Are the Most Effective Ways to Restore Headlights?
Restoration goes beyond simple cleaning; it’s about removing deeply oxidized layers to bring back that factory-new transparency. The methods range from budget-friendly DIY kits to professional polishing services that promise consistent results and long-lasting sealant applications.
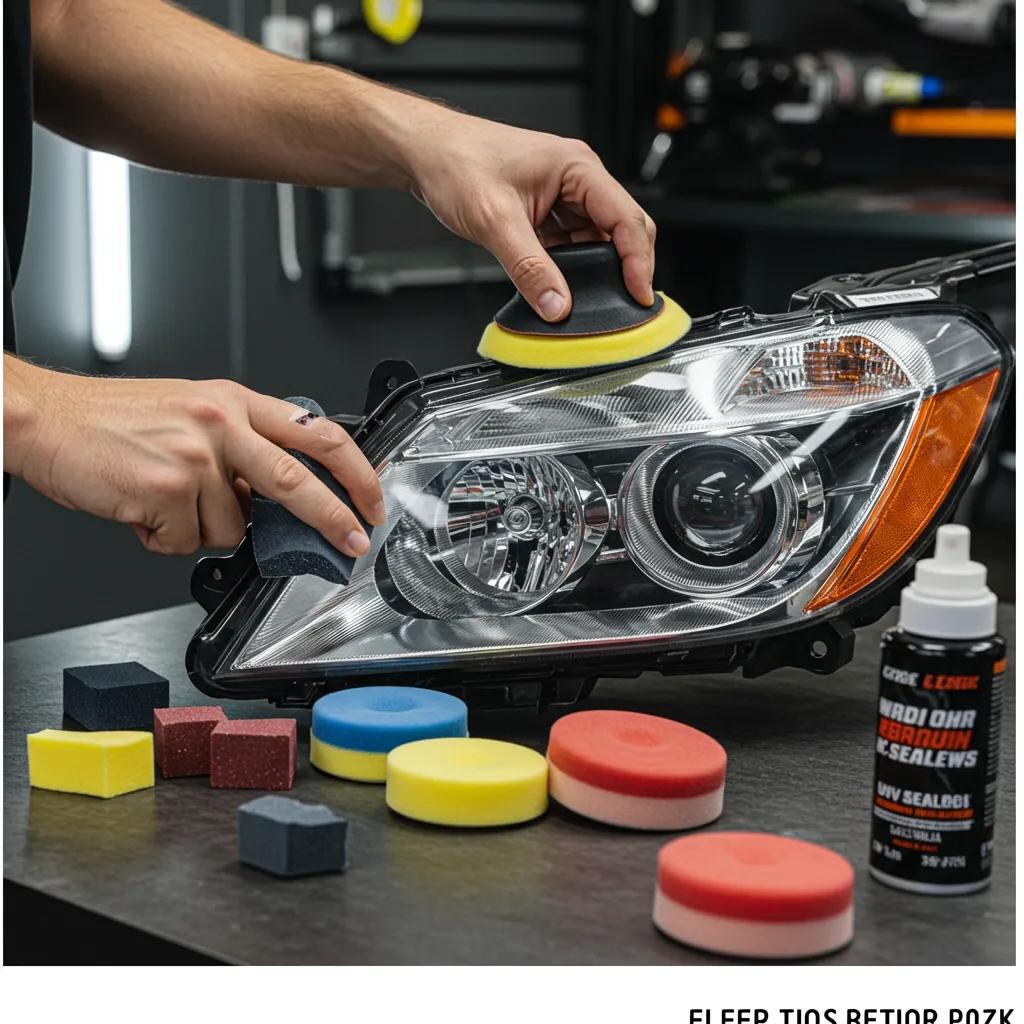
How Do DIY Headlight Restoration Kits Actually Work?
These kits typically include sandpaper in different grits, polishing compounds, and sometimes a UV sealant. The process involves sanding the lens in stages with progressively finer abrasives, buffing with a compound to smooth the surface, and then applying a sealant to prevent quick re-oxidation.
When Is It a Good Idea to Opt for Professional Headlight Polishing Services?
Professional polishing is the way to go when DIY methods don’t quite get the uniform clarity you’re looking for, or if you need results quickly. Professionals use specialized buffing tools, high-quality compounds, and industrial-grade UV coatings to achieve a flawless finish that often lasts longer than consumer-grade products.
What Tools and Supplies Do You Need for Headlight Restoration?
| Restoration Tool | Material Needed | What It’s For |
|---|---|---|
| Sanding Blocks | Sandpaper with various grits | To remove oxidized layers |
| Polishing Pad and Compound | Fine abrasive polish | To smooth out the lens surface |
| UV-Resistant Sealant | A protective coating formula | To shield the lens from future UV damage |
| Microfiber Cloths | Soft, lint-free fabric | For cleaning and buffing without scratching |
How Can You Prevent Future Headlight Damage and Make Them Last Longer?
Preventing lens degradation comes down to blocking UV rays, minimizing physical scratches, and adopting smart protective habits. Using sealants, parking wisely, and doing regular checks will keep your headlights clear and working well for years to come.
What’s the Importance of UV Protection in Headlight Care?
UV protective coatings act as a shield, preventing harmful ultraviolet radiation from reaching the polycarbonate surface. By reflecting or absorbing these damaging rays, these sealants stop oxidation right at the source, preserving the lens’s clarity.
How Do Headlight Sealants Work, and How Do You Apply Them?
Sealants bond to the polished lens surface, filling in microscopic imperfections and creating a water-repellent layer. To apply, simply clean the lens, spray or brush on the sealant, and let it fully cure to form a tough, clear protective barrier.
What Parking and Maintenance Habits Help Protect Your Headlights?
- Always try to park in shaded spots or under cover to reduce direct UV exposure.
- Wash your car regularly to remove abrasive road salt and grime.
- Give your lenses a quick check once a month for any early signs of oxidation or scratches.
How Do You Check and Make Sure Your Headlights Meet Safety Standards?
Ensuring your headlights are performing correctly involves checking their brightness, aim, and the clarity of the lenses. Regular checks keep the lenses aligned, ensure they’re emitting the right amount of light (lux levels), and are free from distortions that could interfere with advanced driver-assistance systems.
How Can You Test Headlight Brightness and Aim?
Use a light meter to measure the lux output at a set distance, and then adjust the aim screws to center the beam within the manufacturer’s specified vertical and horizontal limits. This ensures the light is focused correctly without blinding other drivers.
What Are the Common Signs That Headlights Need Repair or Replacement?
Watch out for persistent flickering, signs of water getting inside the lens, uneven light patterns, or any cracks in the housing. Any of these issues signal a component failure or lens damage that requires professional attention.
How Do Clear Headlights Benefit Advanced Driver-Assistance Systems (ADAS)?
Crystal-clear lenses are vital for camera-based ADAS features, like lane-departure warnings and automatic high-beam control, to receive accurate light signals. This precision boosts the reliability of these systems and enhances overall vehicle safety.
What Are the Most Common Questions About Headlight Maintenance?
Drivers often ask about how often they should clean their headlights, how long restoration results last, and what the best products are for dealing with foggy lenses. Answering these questions helps build a maintenance plan that balances DIY efforts with professional support.
- Consistent care involves a mix of basic cleaning, applying UV protection, and occasional professional polishing to keep your lights performing at their best.
- How long restoration lasts depends on the quality of the sealant used and the environmental conditions; typically, it needs a touch-up every six months to two years.
- Using kits with proven abrasive grits and carefully following the step-by-step instructions will give you the most reliable results for DIY repairs.
By incorporating these tips into your regular car care routine, you’ll ensure your headlights stay clear and safe all year round, while also avoiding the need for costly replacements down the line.
Bright, well-maintained headlights do more than just improve your visibility at night; they also ensure you’re compliant with the law and support your car’s advanced safety systems. Putting in the effort for regular cleaning, restoration, and UV protection pays off with long-term performance, cost savings, and peace of mind on every drive. For expert headlight polishing and restoration services in Columbus, Ohio, reach out to your trusted automotive service and repair center to achieve that showroom-quality clarity and maintain top-notch road safety.